Gift wrapping transforms an ordinary present into an anticipated experience. While the skill may seem minor, mastering the basics elevates any occasion from birthday celebrations to holiday mornings. This guide walks through everything from gathering supplies to finishing touches, ensuring clean results whether wrapping your first gift or refining existing skills.
What Materials Do You Need to Wrap a Present?
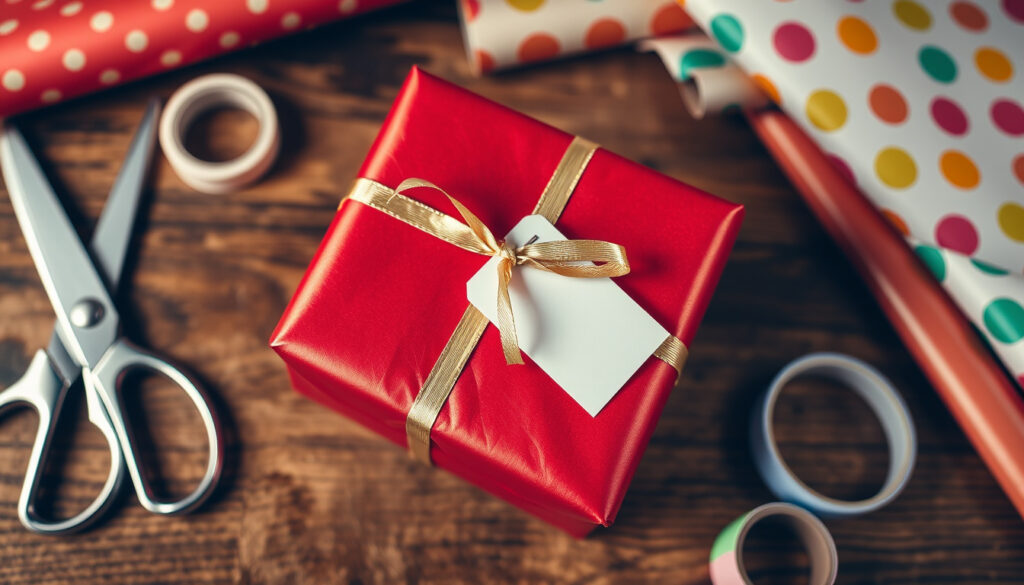
Gathering the right supplies before starting prevents mid-project interruptions and ensures a smoother wrapping process overall.
Classic method for rectangular packages. Time: 5-10 minutes per gift.
Quick alternative for oddly shaped items. Time: 3-5 minutes per gift.
Tape-free technique using folds only. Time: 8-12 minutes per gift.
Japanese-inspired reusable wrapping. Time: 5-8 minutes per gift.
- Pro tip: Measure wrapping paper to double the box dimensions before cutting
- Time-saver: Pre-cut ribbons to various lengths and store in a drawer
- Eco-friendly: Use reusable fabric squares instead of paper for multiple occasions
- Professional touch: Double-sided tape hides edges completely for a polished appearance
- Beginner essential: Keep a bone folder or old credit card for crisp creases
- Safety note: Ensure scissors are sharp to avoid tearing paper
| Material | Quantity Needed | Alternatives |
|---|---|---|
| Wrapping Paper | 2x box dimensions in length | Kraft paper, fabric, newspaper |
| Tape | 4-6 pieces per package | Sticky dots, adhesive circles |
| Scissors | 1 sharp pair | Paper trimmer |
| Ribbon | 2 feet minimum per bow | Twine, yarn, fabric strips |
| Ruler or Measuring Tape | 1 | Eye measurement (experts only) |
How Do You Wrap a Present Step by Step?
Preparing the Wrapping Paper
Proper measurement prevents frustration later. Place your gift box face-down on the wrapping paper with longer sides parallel to the paper’s edge. According to Hallmark’s gift wrapping guide, the paper width should reach approximately two-thirds up each side of the box, with enough length to wrap completely around.
Cut the paper, leaving a few extra inches on all sides. This buffer accommodates adjustment during folding and ensures complete coverage without gaps.
Wrapping the Long Sides
Fold the left and right edges of paper up and over the box to meet in the middle, as detailed by Camille Styles. Pull the paper taut to eliminate wrinkles, then secure with tape. For a professional appearance, crease the wrapping paper along the edges of the box before taping.
Creasing along box edges before taping creates clean, sharp lines. Run a bone folder or credit card along each edge for crisp results.
Creating Clean Corner Folds
The triangle-fold technique produces the polished corners seen on professionally wrapped gifts. Fold the top flap of paper down and crease it where it meets the corner to create a triangle shape. Then fold the creased side flaps inward toward the center of the box. Finally, fold the bottom flap up to overlap the side flaps and secure with tape, according to video demonstrations from craft experts.
Repeat this process on the opposite end of the box. Each corner should mirror the other when viewed from any angle.
If paper tears during folding, small pieces of clear tape on the reverse side can reinforce weak spots without being visible from the front.
How to Wrap a Present Without Tape
Tape-free wrapping relies entirely on strategic folding and the natural weight of paper to hold contents secure. This method works particularly well with heavier paper stocks that hold creases well.
Start by measuring and cutting paper as usual. Instead of taping the center seam, bring one edge of paper over the box and tuck it under the opposite side. The tension from the tuck holds the fold in place. For corners, employ the same triangle-fold technique but fold each flap under the previous one without tape, allowing friction and paper weight to maintain the shape.
Heavier paper stocks like kraft or matte finish work best for tape-free methods. Avoid glossy or slippery papers, as these tend to shift without adhesive.
How to Wrap Awkwardly Shaped or Small Gifts
Cylindrical Presents
Roll the cylinder on its side along the paper to measure circumference plus a two-inch overlap. Cut a piece approximately twice the height of the cylinder plus two inches. Place the cylinder in the center, roll paper around it, and tuck one edge under the other. For the ends, gather paper pleats like an envelope and secure with a decorative band or ribbon rather than tape.
Small Items
Small gifts benefit from the bag method rather than traditional wrapping. Place the item in a gift bag, gather the bag top, and tie with ribbon. This approach proves faster and accommodates items that lack flat surfaces for tape.
Irregular Shapes
For oddly shaped items, build a simple box frame from cardboard to create uniform surfaces. Cover the frame with paper, then hide seams with ribbon or decorative elements. According to Good Housekeeping’s craft section, strategic placement of bows and tags draws attention away from uneven edges. For more ideas on how to wrap gifts, check out these ground beef dinner recipes.
How Do You Make a Bow for a Wrapped Present?
A well-crafted bow elevates the entire presentation. Place your wrapped gift horizontally on your workspace. Slide ribbon under the package so it lies flat against the underside. Bring both ends up and across the top, creating an X shape on the package surface. Tie a simple knot at the center intersection.
Form the bow loops by bringing ribbon ends down and creating circles that droop naturally below the knot. Pull loops outward to expand, adjusting until both sides appear balanced. The tails should hang at different lengths for a natural look.
Use scissors to cut small V-shaped notches at the ends of ribbon tails for a clean, professional appearance that prevents fraying.
What Techniques Ensure Professional Results?
Several practices distinguish professional wrapping from amateur attempts. Craft experts recommend using double-sided tape on the ends to hide tape edges for a polished look. Crease all edges and folds firmly after wrapping is complete for a clean, professional appearance that holds up during transport.
Work on a flat, clean surface with adequate lighting. Ensure paper lies smooth before making any cuts or folds. Measure twice, cut once remains essential advice for waste reduction and quality results.
Understanding Gift Wrapping Context
Gift wrapping originated from practical needs to protect items during transport. The tradition evolved into an art form, particularly in Japan where furoshiki wrapping with fabric became both aesthetic and sustainable. Contemporary gift wrapping combines functionality with creative expression, transforming the reveal moment into a sensory experience.
Neat wrapping communicates care and respect for the recipient. The extra effort signals that the gift matters enough to warrant presentation beyond simply placing it in a bag.
Established Facts Versus Remaining Questions
| What We Know | What Remains Unclear |
|---|---|
| Triangle-fold corners work universally | Optimal paper thickness for specific gift types |
| Double-sided tape produces cleaner results | Long-term durability comparisons between methods |
| Creasing before taping improves appearance | Environmental impact data for various wrapping materials |
| Ribbon placement affects perceived gift value | Universal preferences across different cultures |
“Wrapping elevates the gift experience, transforming the reveal into an anticipated moment.”
— Etiquette and presentation experts
For those seeking further holiday planning assistance, Printable Monthly Calendar 2024 – Free PDF Downloads and Templates provides helpful organizational resources. Budget-conscious shoppers may also find value in comparing Does Target Price Match – What You Need to Know when sourcing gifts.
Summary
Gift wrapping combines practical technique with creative expression. Success depends on gathering appropriate materials, measuring carefully, and executing fundamental folds consistently. Whether using traditional tape methods or exploring tape-free alternatives, the principles remain constant: measure twice, crease sharply, and finish with intention. Practice improves speed and confidence, making wrapping one of those skills that rewards modest investment with lasting results.
Frequently Asked Questions
What is the easiest way to wrap a gift?
The bag method represents the easiest approach for oddly shaped or small items. Place the gift in a bag, gather the top, and tie with ribbon. For boxes, the triangle-fold technique provides the cleanest results with minimal practice.
How do you make corners look professional when wrapping?
The triangle-fold technique creates professional corners. Fold the top flap down creating a triangle, fold side flaps inward, then fold the bottom flap up to overlap. Secure with tape. Creasing along box edges before folding produces the sharpest lines.
Can you wrap gifts without using tape?
Yes. Tape-free wrapping relies on strategic folding and paper weight. Use the tuck method for center seams and fold corner flaps under each other without adhesive. Heavier paper stocks work best for this technique.
What type of paper works best for gift wrapping?
Matte finish papers accept creases cleanly and resist slipping. Kraft paper offers durability and a natural aesthetic. Avoid thin glossy papers for beginners, as these tear more easily and require more precise handling.
How do you wrap cylindrical gifts?
Measure the cylinder’s circumference plus overlap, and height plus two inches. Center the item, roll paper around it, and tuck edges. Gather paper pleats at the ends like an envelope and secure with ribbon rather than tape.
What supplies are essential for beginners?
Essential supplies include wrapping paper, sharp scissors, tape (regular or double-sided), ribbon, and a ruler or measuring tape. A bone folder or old credit card helps create crisp creases without specialized tools.
How do you create a balanced bow?
Place gift horizontally, slide ribbon under the box, bring ends up to form an X, and tie a knot. Create loops by forming circles below the knot and pulling outward. Cut V-shaped notches in ribbon tails for a polished finish.